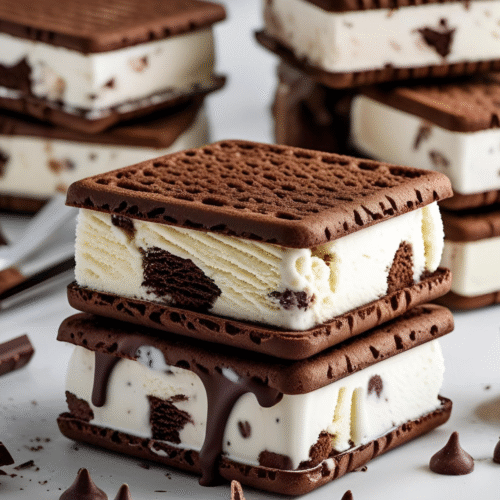
Old Fashioned Ice Cream Sandwiches
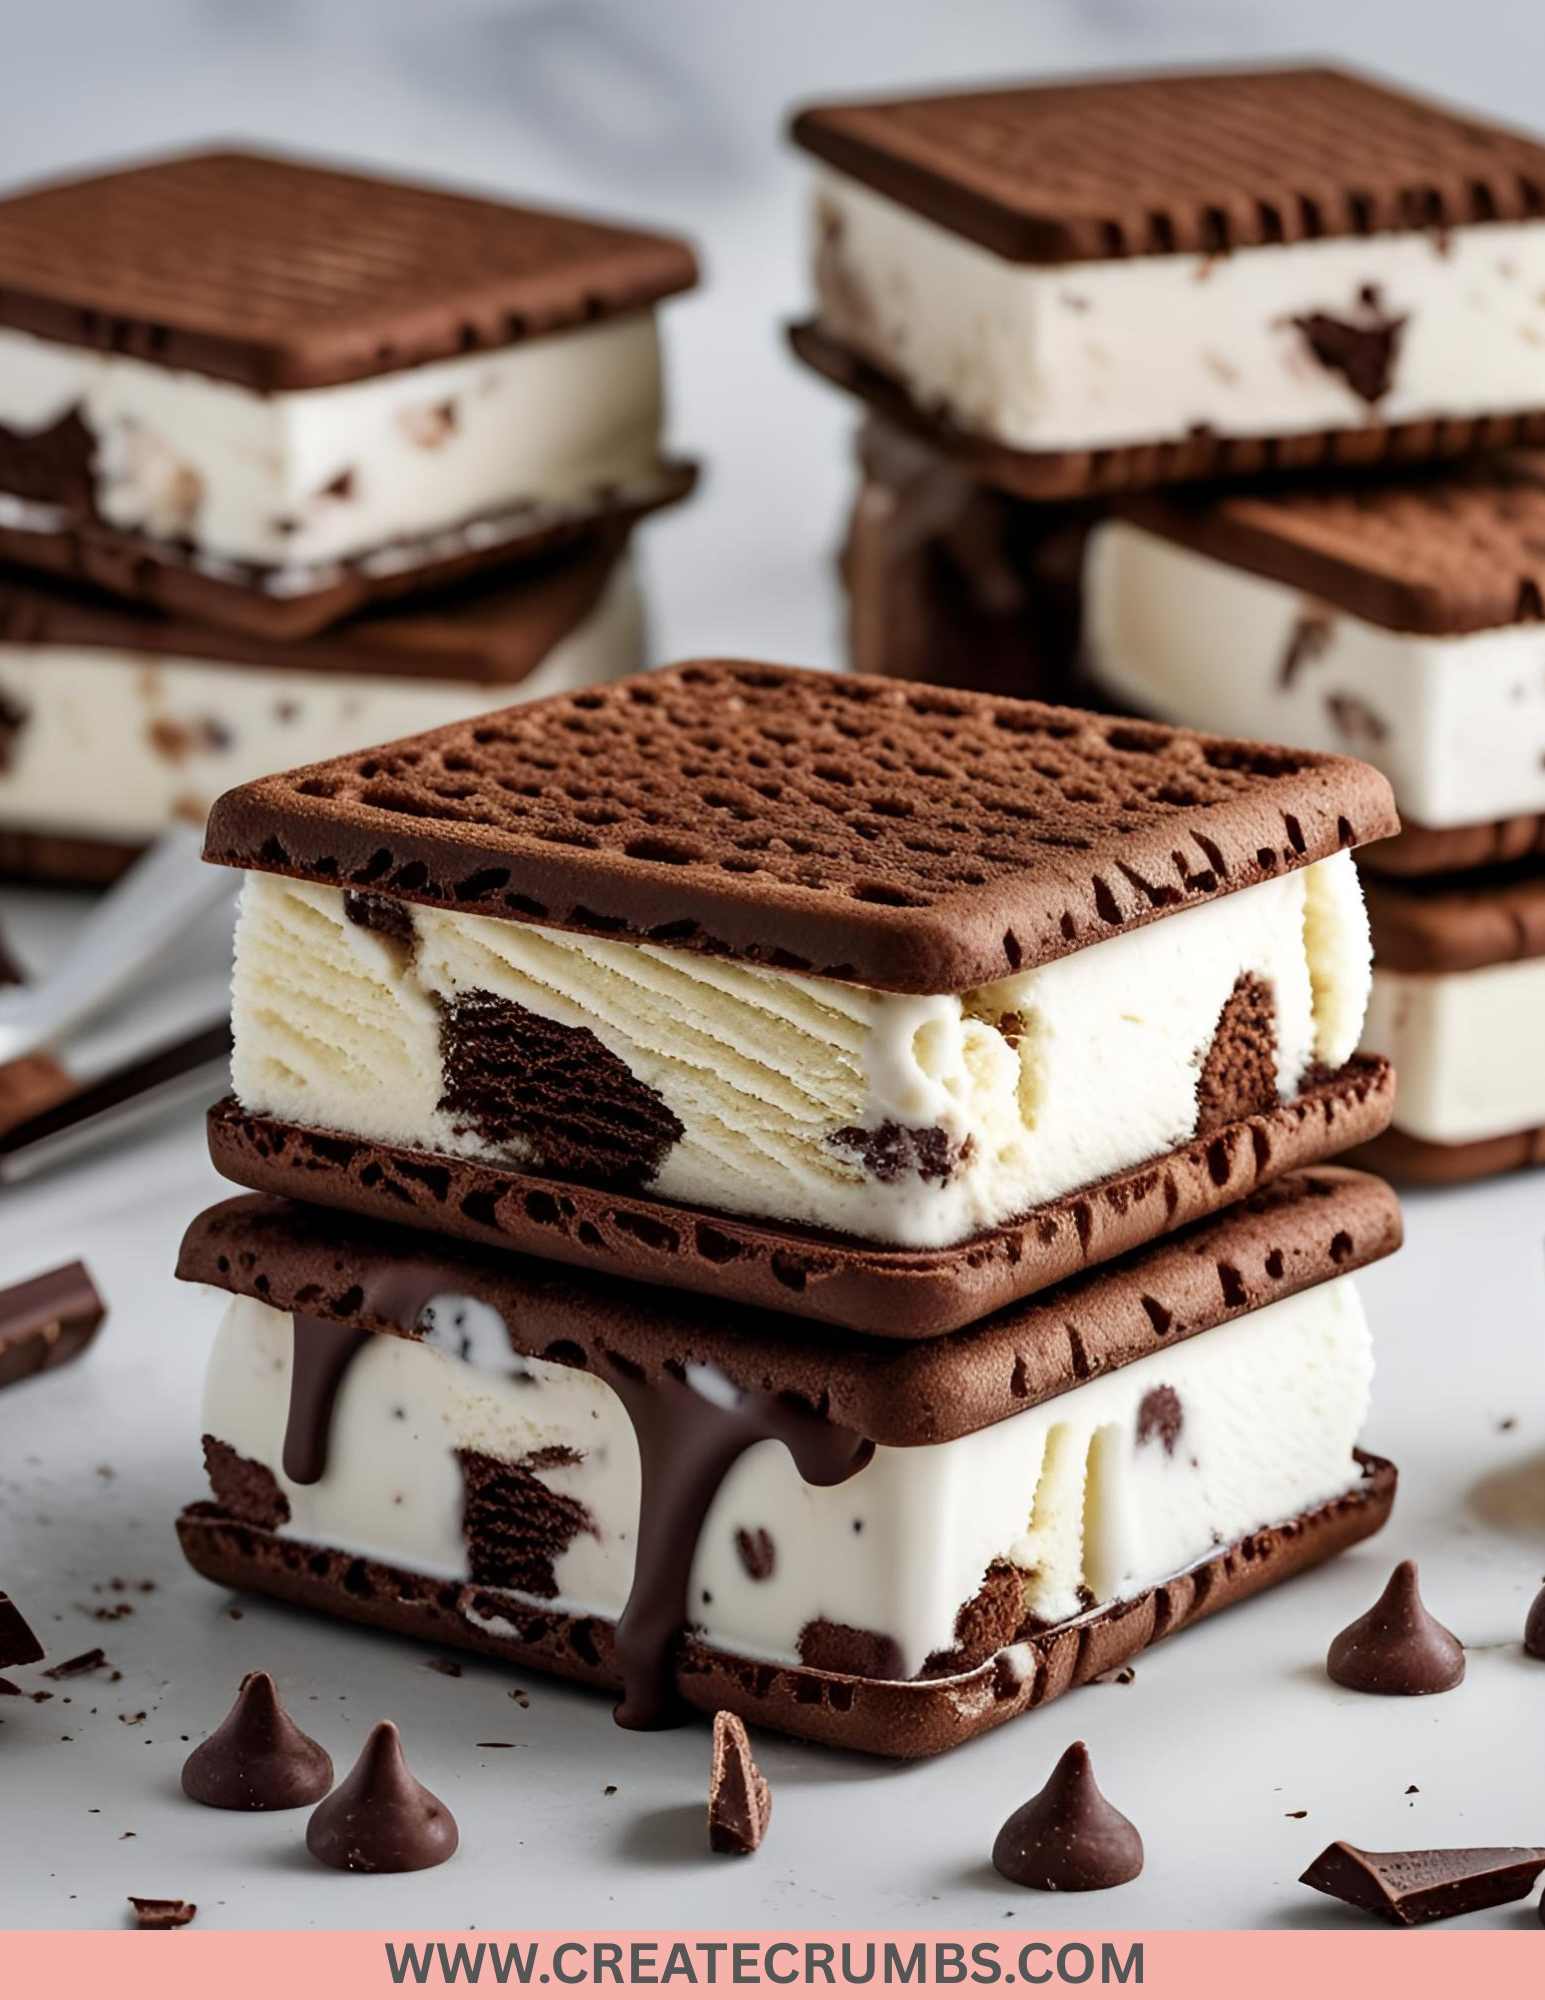
Old Fashioned Ice Cream Sandwiches
Classic ice cream sandwiches made with soft, chewy chocolate cookies and creamy vanilla ice cream. Perfect for a nostalgic treat, summer dessert, or anytime you want a sweet, portable indulgence.
Ingredients
For the Cookies:
-
1 cup unsalted butter, softened
-
1 cup granulated sugar
-
1 cup packed brown sugar
-
2 large eggs
-
1 tsp vanilla extract
-
2 cups all-purpose flour
-
2/3 cup unsweetened cocoa powder
-
1 tsp baking soda
-
1/2 tsp salt
For the Filling:
-
1 quart (4 cups) vanilla ice cream, slightly softened
-
Optional: chocolate chips or sprinkles for rolling edges
Instructions
-
Preheat Oven:
Preheat oven to 350°F (175°C). Line baking sheets with parchment paper. -
Make Cookie Dough:
In a large bowl, cream together butter, granulated sugar, and brown sugar until light and fluffy. Beat in eggs and vanilla extract. -
Combine Dry Ingredients:
In a separate bowl, whisk together flour, cocoa powder, baking soda, and salt. Gradually add dry ingredients to wet mixture, mixing until combined. -
Shape Cookies:
Scoop dough into 2-tablespoon portions and roll into balls. Place on prepared baking sheets, spacing about 2 inches apart. Flatten slightly with the bottom of a glass or your hand. -
Bake:
Bake for 10–12 minutes, or until cookies are set but still soft. Allow to cool on the baking sheet for 5 minutes, then transfer to a wire rack to cool completely. -
Assemble Sandwiches:
Place a scoop of slightly softened ice cream on the flat side of one cookie. Top with another cookie, pressing gently to spread ice cream evenly. -
Optional Finishing Touch:
Roll edges in chocolate chips or sprinkles if desired. Wrap individually in parchment or plastic wrap and freeze for at least 1 hour before serving.
Equipment
-
Large mixing bowl
-
Medium mixing bowl
-
Electric mixer or whisk
-
Measuring cups and spoons
-
Baking sheets
-
Parchment paper
-
Wire cooling rack
-
Spatula
-
Ice cream scoop
Timing
-
Prep Time: 20 minutes
-
Cook Time: 12 minutes per batch
-
Chill/Freeze Time: 1 hour
-
Total Time: ~1 hour 45 minutes
Serving Size
Makes 12–16 sandwiches, serves 6–8
Old Fashioned Ice Cream Sandwiches
Equipment
- Large mixing bowl
- Medium mixing bowl
- Electric mixer or whisk
- Measuring cups and spoons
- Baking sheets
- Parchment paper
- Wire cooling rack
- Spatula
- Ice cream scoop
Ingredients
- For the Cookies:
- 1 cup unsalted butter softened
- 1 cup granulated sugar
- 1 cup packed brown sugar
- 2 large eggs
- 1 tsp vanilla extract
- 2 cups all-purpose flour
- 2/3 cup unsweetened cocoa powder
- 1 tsp baking soda
- 1/2 tsp salt
- For the Filling:
- 1 quart 4 cups vanilla ice cream, slightly softened
- Optional: chocolate chips or sprinkles for rolling edges
Instructions
- Preheat Oven:
- Preheat oven to 350°F (175°C). Line baking sheets with parchment paper.
- Make Cookie Dough:
- In a large bowl, cream together butter, granulated sugar, and brown sugar until light and fluffy. Beat in eggs and vanilla extract.
- Combine Dry Ingredients:
- In a separate bowl, whisk together flour, cocoa powder, baking soda, and salt. Gradually add dry ingredients to wet mixture, mixing until combined.
- Shape Cookies:
- Scoop dough into 2-tablespoon portions and roll into balls. Place on prepared baking sheets, spacing about 2 inches apart. Flatten slightly with the bottom of a glass or your hand.
- Bake:
- Bake for 10–12 minutes, or until cookies are set but still soft. Allow to cool on the baking sheet for 5 minutes, then transfer to a wire rack to cool completely.
- Assemble Sandwiches:
- Place a scoop of slightly softened ice cream on the flat side of one cookie. Top with another cookie, pressing gently to spread ice cream evenly.
- Optional Finishing Touch:
- Roll edges in chocolate chips or sprinkles if desired. Wrap individually in parchment or plastic wrap and freeze for at least 1 hour before serving.
Frequently Asked Questions (FAQs)
Can I make these sandwiches with other ice cream flavors?
Yes. Chocolate, strawberry, or any flavor works. Just ensure the ice cream is slightly softened before assembling.
Can I make the cookies ahead of time?
Yes. Bake cookies in advance and store in an airtight container at room temperature for up to 3 days or freeze for longer storage.
Can I use store-bought cookies?
Yes. Soft, chewy cookies work best for homemade ice cream sandwiches.
Can I make them dairy-free?
Yes. Use non-dairy butter for cookies and plant-based ice cream for the filling.
Can I add mix-ins to the ice cream?
Yes. Mini chocolate chips, sprinkles, or chopped nuts can be folded into the ice cream before assembling.
Can I freeze the assembled sandwiches?
Yes. Wrap individually in parchment paper or plastic wrap and freeze for at least 1 hour before serving.
Can I make smaller or larger sandwiches?
Yes. Adjust cookie size and ice cream portion to create mini or oversized sandwiches.
Can I make them ahead for a party?
Yes. Assemble and freeze up to 1 week in advance.
Can I roll the edges in toppings?
Yes. Chocolate chips, sprinkles, or crushed cookies make a fun and tasty edge.
How do I prevent ice cream from melting too quickly when assembling?
Work quickly with slightly softened ice cream and keep sandwiches in the freezer until ready to serve.
How To Store Old Fashioned Ice Cream Sandwiches
Freezer:
Wrap each sandwich individually in parchment or plastic wrap and store in an airtight container for up to 1 week.
Serving Tips:
Let sit at room temperature for 2–3 minutes before serving to make slicing and eating easier but serve cold for best texture.